Purpose #
This feature controls which equipment photos appear in the Service Report created when a job is completed. A single setting decides between two options: include every photo automatically, or let the user choose the photos.
How to control it #
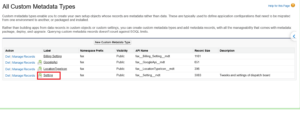
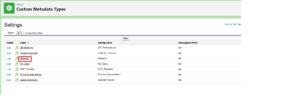
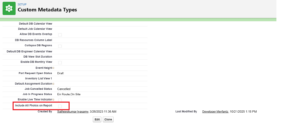
One checkbox, Include All Photos on Report, switches between the two options. It sits in the General record of the Setting custom metadata (Setup → Custom Metadata Types → Setting → Manage Records → General). Checked means all photos; unchecked means the user chooses.
| Mode | Checkbox State | Job Page Action | Service Report Result |
|---|---|---|---|
| Automatic Mode | Checked | Select Photo button is hidden | Every photo taken on the job is included automatically in the report. |
| Manual Selection Mode | Unchecked | Select Photo button is visible | Only the specific photos ticked and saved appear in the report. |
Checkbox checked: all photos are included #
Every photo taken on the job goes into the Service Report automatically. There is nothing to choose, and the Select Photo button is hidden on the Job page.
- Best for teams that want a complete photo record with no extra steps.
Checkbox unchecked: the user chooses the photos #
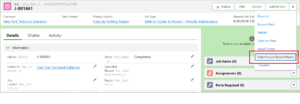
Only the photos selected appear in the report. The Select Photo button is shown on the Job page.
- Open Select Photo on the job.
- All photos from the job are shown as thumbnails with their descriptions.
- Tick the photos to include, and open any photo in a larger view first if needed.
- After Save, the report includes only the ticked photos.
End-to-end flow #
When the report is built, the switch is read once. Checked sends every photo through; unchecked sends only the photos that were saved with Show on Report ticked.
System reads setting: Include All Photos on Report = True
Result: All job photos are automatically embedded directly into the generated Service Report.
System reads setting: Include All Photos on Report = False
Result: Select Photo button is active on Job. User chooses photos; only saved choices appear on the report.
Step-by-step walkthrough #
Part 1: Choose the option #
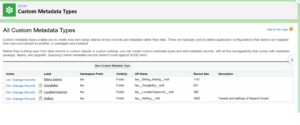
Step 1. Open Custom Metadata Types. In Setup, search for Custom Metadata Types.
Step 2. Open the Setting records. Click Manage Records next to Setting.
Step 3. Open the General record. Click General to see its details, then click Edit.
Step 4. Set the checkbox and save. Tick Include All Photos on Report to include every photo. Leave it unticked to let the user choose. Click Save.
Part 2: Choose photos (checkbox unticked) #
Step 5. Open the job. Open the Job record and click Select Photo Button.
Step 6. Tick the photos for the report. Tap a thumbnail for a larger view. Use Select All if every photo is needed.
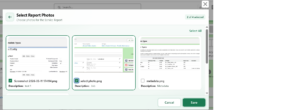
Step 7. Save. Click Save.
Part 3: Report result #
Step 8. Complete the job and open the Service Report. Only the selected photos appear. With the checkbox ticked, all photos appear and Select Photo is not shown.
Good to know #
|
Good to know:
|


